Gear

This gear list is meant to help anybody who signed up for the YAU or is interested in participating. It will help you getting an idea of what is needed.

Please keep in mind that a list or other input can never cater to the needs of every racer. What may work wonders for one athlete may be absolutely useless for the next. It remains your responsibility to have the gear that is right for you.

Last but not least, the below list is not complete. There will be kit, clothing or other items you need/want that are not on this list.

Status end of June 2026 the general kit list with descriptions and input was updated. I will now start work on an actual gear list with a specific focus on light weight further down. It will be a work in progress and hopefully finished by end of July.

Clothing – 1st layer

You have plenty of options for your 1st layer, but the priorities are always the same: comfort, freedom of movement, and moisture management over long durations. You’ll try to manage your effort and layers to avoid sweating, but it won’t always work 100%. When it happens, you want a base layer that moves moisture away from your skin and dries quickly.

1st layers range from very thin to more insulating options. The right choice depends on the conditions, how you personally handle the cold, and how the piece integrates into your overall layering system.

A higher percentage of merino wool can help manage odor. That said, merino isn’t for everyone – make sure your skin tolerates it over extended wear. I like merino, but over time it dries out my skin and becomes itchy. It also doesn’t always move moisture as efficiently as synthetics. While it retains warmth when wet, running for hours in a damp layer isn’t ideal. That’s why many brands blend merino with synthetic fibers to balance comfort and performance.

Winter running tights aren’t listed below, but they can work well as a base layer. In milder conditions, they may be all you need for your legs. Just be careful with wind exposure – non-windproof tights can become a liability. You may not immediately notice it, but sustained exposure to cold wind can increase the risk of frostbite.

Other things to consider:

  • Does the shirt have a zip collar with a metal puller? If so, does the puller come into contact with your skin (= potential for frostbite)?
  • How does your base layer interact with your other layers?
  • What’s your drop bag strategy – what are you carrying, and what are you planning to swap out later in the race?
Thin longsleeve shirt with zip neck I really liked Montane’s Primino range. It was 50% merino wool yarns, combined with 25% PrimaLoft® and 25% Polyester. My favourite version was 140 g/m² – a rather thin layer but surprisingly warm.

The combination of fabrics worked really well and tried to find the middle ground between the positive effects of merino wool and improved moisture management and durability with high quality Polyester.

So, that’s what I would be looking for: a thin 1st layer that features merino wool but also synthetic fibres for the best of both worlds.

An example would be the Woolpower Zip Turtleneck LITE.

If you can’t wear merino wool, you could pick light and functional winter underwear from your favourite brand – most brands will have something like this in their range. It definitely makes sense to go with a product that does feature Polygiene®-treatment – to help prevent odor.

220 g
(size M)

Medium weight longsleeve shirt with zip neck This is one step up in warmth. Some brands would call this “thermal” underwear. Again, you may find something with a certain content of merino if you like. The weight should be around 200 g/m².

I am a big fan of the Woolpower Zip Turtleneck 200. There is a reason why this product is basically the same ever since it was invented. It simply can’t be improved.

Again, if you can’t wear merino, there are plenty of alternatives that are 100% synthetic. And of course there are many brands making this category of underwear with merino.

250 g
(size M)

Thick longsleeve shirt with zip neck This category crosses over into the 2nd layer. A great material is Polartec® PowerStretch® Pro™, e.g. the Warmpeace Fram Pullover. You could wear it next to skin as a really warm 1st layer but also as a 2nd layer over a thinner shirt.

The nice thing about Polartec® is that it is very warm, super comfortable, moves moisture away efficiently, dries quickly and is light.

320 g
(size M)

Thin long johns This is a reflection of the shirt. For the sake of having a weight, I will go with the Woolpower Long Johns LITE.

195 g
(size M)

Medium weight long johns Same as above. So, let’s go with the Woolpower Long Johns 200.

200 g
(size M)

Thick long johns I will go with the Warmpeace Fram Pants. Like the shirt, it is made from Polartec® PowerStretch® Pro™.

250 g
(size M)

Other options / Things to consider

There is too much product on the market for me to be certain I am not forgetting anything interesting.

One brand that I really like is X-BIONIC. They have an incredible amount of features in their first layers the moisture management is excellent. It’s an interesting option for anyone who can’t use merino wool or wants to complement merino layers with something 100% synthetic.

Another type of product that seems to be on the rise is underwear of things that I have tried are with netting (e.g. Aclima WoolNet). The idea is that is saves weight but does not compromise on insulation because the trapped air also keeps warm. And of course it breathes well and dries quicker.

Saving weight

When it comes to saving weight with 1st layers, the question is not so much about what fabric to use. You will definitely want a thin and a medium weight 1st layer. A thicker layer of Polartec® PowerStretch® Pro™ or similar is also good to have. It’s more about how many sets of underwear you want to take … Ideally, you use your drop bag well for this, i.e. obviously don’t carry the underwear for the entire race with you if you can deposit some in your drop bag. The rest is personal preference. If your sled ends up being too heavy, the quantity of underwear you have with you is something you can re-visit.

Clothing – 2nd layer

Again, there are many options. Some of the above below be worn on top of underwear or over a 2nd layer and thus be turned into a 3rd layer.

The main focus of your 2nd layer will likely be additional warmth. Windproofness may not be relevant, yet. However, there are plenty of 2nd layers which already keep the wind out.

Breathability is still very important and you want something that transports moisture on to the next layer. Synthetic fills like PrimaLoft® are very popular as they are warm, pack down well, are light, robust and easy to handle (there is no down that can clump) and no pilling of any surfaces.

Thin down jackets  or tops are an option for those who have an absolute focus on ligth weight. No synthetic fill can beat down on warmth to weight ratio. Just make sure you get  high quality treated down as it will handle moisture a lot better.

If you like natural fibres, merino remains an option, too. Woolpowers 400 and 600 g ranges are pretty amazing. Just pack size and weight are not as good.

Thin fleece jacket or top This could be something made of Polartec® PowerStretch® Pro™, i.e. thin, close fit and perfect for moisture transport. Of course there are also plenty of fabrics with the same features that are not Polartec®.

It’s a matter of personal preference if you want something with a high colar and more a jacket style with a full-lenght zip or something with a 1/2 or 3/4 lenght front zip. Obviously, the advantage of the zip is better temperature control. An example would be the Montane Fury Lite Fleece Jacket (290 g), made out of THERMO STRETCH.

Another type of fleece that works well as a second layer is Polartec® Power Grid™. As Polartec® puts it: “… designed to optimize and regulate body temperature. The proprietary grid fabric construction bi-component knit wicks away moisture and transfers it to outer layers for fast evaporation. It’s grid design creates open air channels to increase breathability and reduce bulk, while enhancing thermoregulation. A reference product would be the Montane Protium Lite Pull On Fleece (200 g) – which is not Polartec® but THERMO GRID.

200 – 300 g
(size M)
Medium to thick fleece jacket When we move on from the thinner to the thicker fleece layers you have an incredible choice of materials, styles and features. The focus remains additional warmth and breathability.

Some fabrics, are high-pile, like Montane’s THERMO HL or Polartec® High Loft™ have a structure that will trap air and thus the weight to warmth ratio is really good. Also, these materials are super comfy and will dry quickly.
If we take the Montane Caldus XT Hooded Fleece Jacket as an example, we are looking at a weight of 490 g.

Often these jackets are hybrid, i.e. combine different types of fabrics to improve the performance of the product. They might have patches of windroof fabric in the chest area and/or a more breathable fabric on the sides and/or robust fabric in areas of “wear and tear”.

Lighter fleece jackets with less “fancy” stuff, like the Revolution Race Hiker Full-zip Fleece will be around 300 g in weight.

300 – 600 g
(size M)
Synthetic fill top or jacket In this category ther is some surprisingly light product. Still the warmth you will get from a layer like this is really good. Another big “pro” is the small pack size and the fast drying. The Montane Fortes Nano Insulated Half-Zip Jacket only weighs 210 g. Their Sirocco Hooded Insulated Jacket with a full front zip and hood is about 350 g.

A further advantage of these types of jackets is that the outer fabric will often be windproof or wind resistant. So, should the wind pick up you may not immediately need a layer on top. Of course, the more weather resistant the outer fabric is the less it will breathe.

Most brands will have something like this in their range. And, just with the above fleece jackets, the construction can also be hybrid, e.g. integrating fleece or different outer fabrics in the construction.

200 – 400 g
(size M)
Down filled tops Down as a 2nd layer can be tricky. Even if the down is treated, it won’t work as well when wet. So, using it would only make sense if you hit that sweet spot of needing the warmth but you won’t start sweating. The one thing that makes it interesting to consider is of course weight and pack size. Both will be really good for the amount of warmth you get. Plus, you can of course use it as a 3rd layer.

Not many brands make actual down tops. Cumulus is an exception. They have the Plancklite Down Pullover that only weighs 130 g (!). Their Primelite Pullover at 190 g is also very interesting.

There of course are light down jackets you could wear as a 2nd layer but I will put those in the category “additional insulation” further below.

130 – 200 g
(size M)
(Merino) wool tops or jackets If you are a big fan of (merino) wool you may have or want to consider that material for a 2nd layer, too. When it comes to sustainability and the natural properties of the material, it is a good choice. The issue with the 2nd layer will be weight. For example, the Woolpower Full Zip Jacket 400 weighs 570 g. 570 g
(size M)

Other options / Things to consider

In general, for your choice of layers you need to consider if you are someone who sweats quickly and/or you do get cold easily. If you sweat easily, you will have to manage your layers well and focus breathability. If you get cold quickly, you want to make sure you do have some really warm options.

While some 1st layers may not have a zip, the 2nd layers will. Make sure all your clothing features high quality zippers, e.g. YKK. Many cheap brands or product uses zippers of lesser quality. While that may not be much of an issue when used in a warm climate, it can really be a pain in the cold.

Also, when it comes to durability, should you be wearing your pulk harness over the 2nd layer, beware that there will likely be abrasion. The weaker the outer fabric, the more abrasion you will get.

Since a few years, the outdoor industry has put more emphasis on sustainability. By now there are a lot of materials with high or 100% recycling content. If you are buying products with synthetic fabrics, it’s worth checking if you can get something that is recycled.

Saving weight

The situation is similar to what you are dealing with regarding your 1st layers. It is still more about how many and not so much about what type of layers you have in your sled.

One way to save weight is by steering away from heavy merino wool products. Another option is to complement the fleece jackets you have with something that uses a synthetic fill or maybe even down. Especially the thick fleece jackets can be quite heavy …

I am text block. Click edit button to change this text. Lorem ipsum dolor sit amet, consectetur adipiscing elit. Ut elit tellus, luctus nec ullamcorper mattis, pulvinar dapibus leo.

Clothing 3rd layer/insulation

You likely will need a third and insulated layer to move when it gets very cold. Of course there are thinner insulated layers for less extreme temperatures and warmer ones when we reach – 20°C, -30°C, -40°C or colder.

Some insulation you will need when you stop to melt snow, prepare a meal, need to repair something, etc. You are not moving, your body does not generate heat and you need this clothing to stay warm. This also means that there is potential trouble if you are moving and you already are wearing your warmest jacket and pants.

When chosing your warmest clothing please also keep in mind that with fatigue and exhaustion your body will need more insulation than it normally would.

You may also need this equipment when temperatures go down to extremes in order to get a bit more insulation in your sleeping system.

Do not underestimate emergencies. You may plan to avoid staying out in the cold without moving. However, circumstances may force you to do it. You may encounter another athlete you need to help, you may not find the trail due to fresh snow or may have a problem yourself.

Thin jacket with synthetic insulation Let’s start with a thin layer of synthetic insulation, like the Rab Xenair Alpine Flex Insulated Jacket. For that, Rab have combined “PrimaLoft® Gold Active+ insulation, which breathes and insulates through peaks and troughs of activity, with low-bulk Thermic™ stretch fleece side panels that offer superb mobility and make the jacket easy to layer”.

354 g
(size M)

Thick jacket with synthetic insulation There is of course also a category in between the thin and the thick insulation – basically anything that is in between the two weight classes. You may also prefer to have a medium weight and a warmer layer rather than a thin one.

Basically, this jacket, in combination with layers underneath, should be warm enough while moving down to the extreme temperatures. Stayin in Rab’s product range, the Cirrus Ultra Insulated Hooded Jacket is an interesting choice.

“The Cirrus Ultra takes synthetic performance to the next level, offering exceptional warmth for weight. It’s filled with new PrimaLoft® ThermoPlume®+ loose fill insulation, which closely mimics the lofting capabilities of down while expertly dealing with damp, cold weather. Boosted with heat-reflective TILT and body-mapped sheet insulation that stands up to moisture and rigorous use, it offers you instant warmth and comfort in any conditions. Durable, packable, and loaded with storage …”.

548 g
(size M)

Thin down jacket Another way to get insulation is a down jacket. Since you may use this layer a lot, the obvious challenge is to avoid sweating. That’s always important but with down clothing it is paramount. Treated down handles moisture better but it has its limitations.

However, when it comes to getting great warmth, with low weight and small pack size, down is incredible.

The Cumulus Inverse Jacket for example is in the category of very light down jackets. It features high quality materials and filling at a weight of 230 g.

230 g
(size M)

Thick down jacket Similar to above, I will jump right to the warmer down jackets. You have one million choices for a jacket between the two “extremes”. Mind you, this still is not your expedition down jacket!

It is tricky to use a thick down jacket while on the move. Again, mainly because of the risk of sweating and not being able to use it when you most need it.

The Rab Glaceon Pro Down Jacket is in this category. It uses 265 g (size M) of 700FP recycled down with Nikwax fluorocarbon-free hydrophobic finish.

584 g
(size M)

Expedition down jacket This is the jacket that is specified by the rules. It is your lifeline when things become extreme and/or whenever you come to a stop and need to stay warm. It can also help you beef up your sleeping bag with extra warmth.

You should not need it when you are on the move. If you do use it as you are moving, DO NOT SWEAT into it!

Most brands that cater to high altitude mountaineering have a jacket in this category. If you do not want to buy one, you can rent it from us. We use the Montane Apex 8000. It has got 500 g of high quality down fill and many useful features.

NOTE: Down fill is not fill power! Down fill refers to how much the down weighs that is in the jacket. Fill power is an indicator how well the down lofts. So, if you get a down jacket with 800 fill power it is not necessarily warm enough! If you have an expedition down jacket and you are not sure if it’s warm enough or if you want to buy one and you have doubts, please ask! I will let you know if it would pass the gear check.

1,455 g
(size M)

Insulated Pants As is the case with the upper body, you have the choice of down or synthetic insulation for your pants. The Cumulus Basic Down pants weigh 185 g (size M). However, it does not fit a zip that would allow you to put it on without taking your shoes off.

The Rab Photon Insulated Pant uses PrimaLoft® Gold and weighs 547 g (size M). It does feature a size zip to put it on and take it off easily.

185 g
(size M)

Insulated short/skirt I really like insulated shorts – often used for ski touring. It gives me warmth where I need it and allows for a lot of breathability. The Warmpeace Rond Short for example weighs 180 g (size M).

The equivalent for women are the insulated skirts.

180 g
(size M)

Other options / Things to consider

So, once again, many options. In the end, it’s one of those things that you will simply have to try out. You will decide for certain products/combinations and only the race will show you if it works as you expected it. Likely, over the years you will come up with your system and replace something that you initially thought you would like but you found a better solution.

Saving weight

I would recommend to combine down-filled products with synthetic ones. To go 100% down is only a good idea if you have tried it and know you can manage your layers so well that the down won’t get too wet.

Obviously, it is also about quantity. Jackets can weigh quite a bit and it’s not a good idea to take too many jackets … Below I am also giving you a tipp for a very special product that may help you save weight.

Montane Extreme Smock

The Extreme Smock was the reasons why I got in touch with Montane 20+ years ago. It was one of the earliest pieces of kit this British brand had launched and it was a key piece to their early success.

The DRYACTIV 3000 deep pile lining provides exceptional warmth and moisture management. Add to that a windproof outer, removable hood, large kangaroo chest pocket, incredible ventilation and a number of other features and you have a the perfect smock for extreme winter adventures.

Weighing 965 g (size M) it is not the lightest layer. However, you can practically live in it. The fleece will adjust to your body like “memory foam”. It will become your armour and for most it works down to incredibly low temperatures – if you are on the move.

For a couple of years Montane removed the Extreme Smock from their range but last winter it made it back – I am guessing, due to high demand.

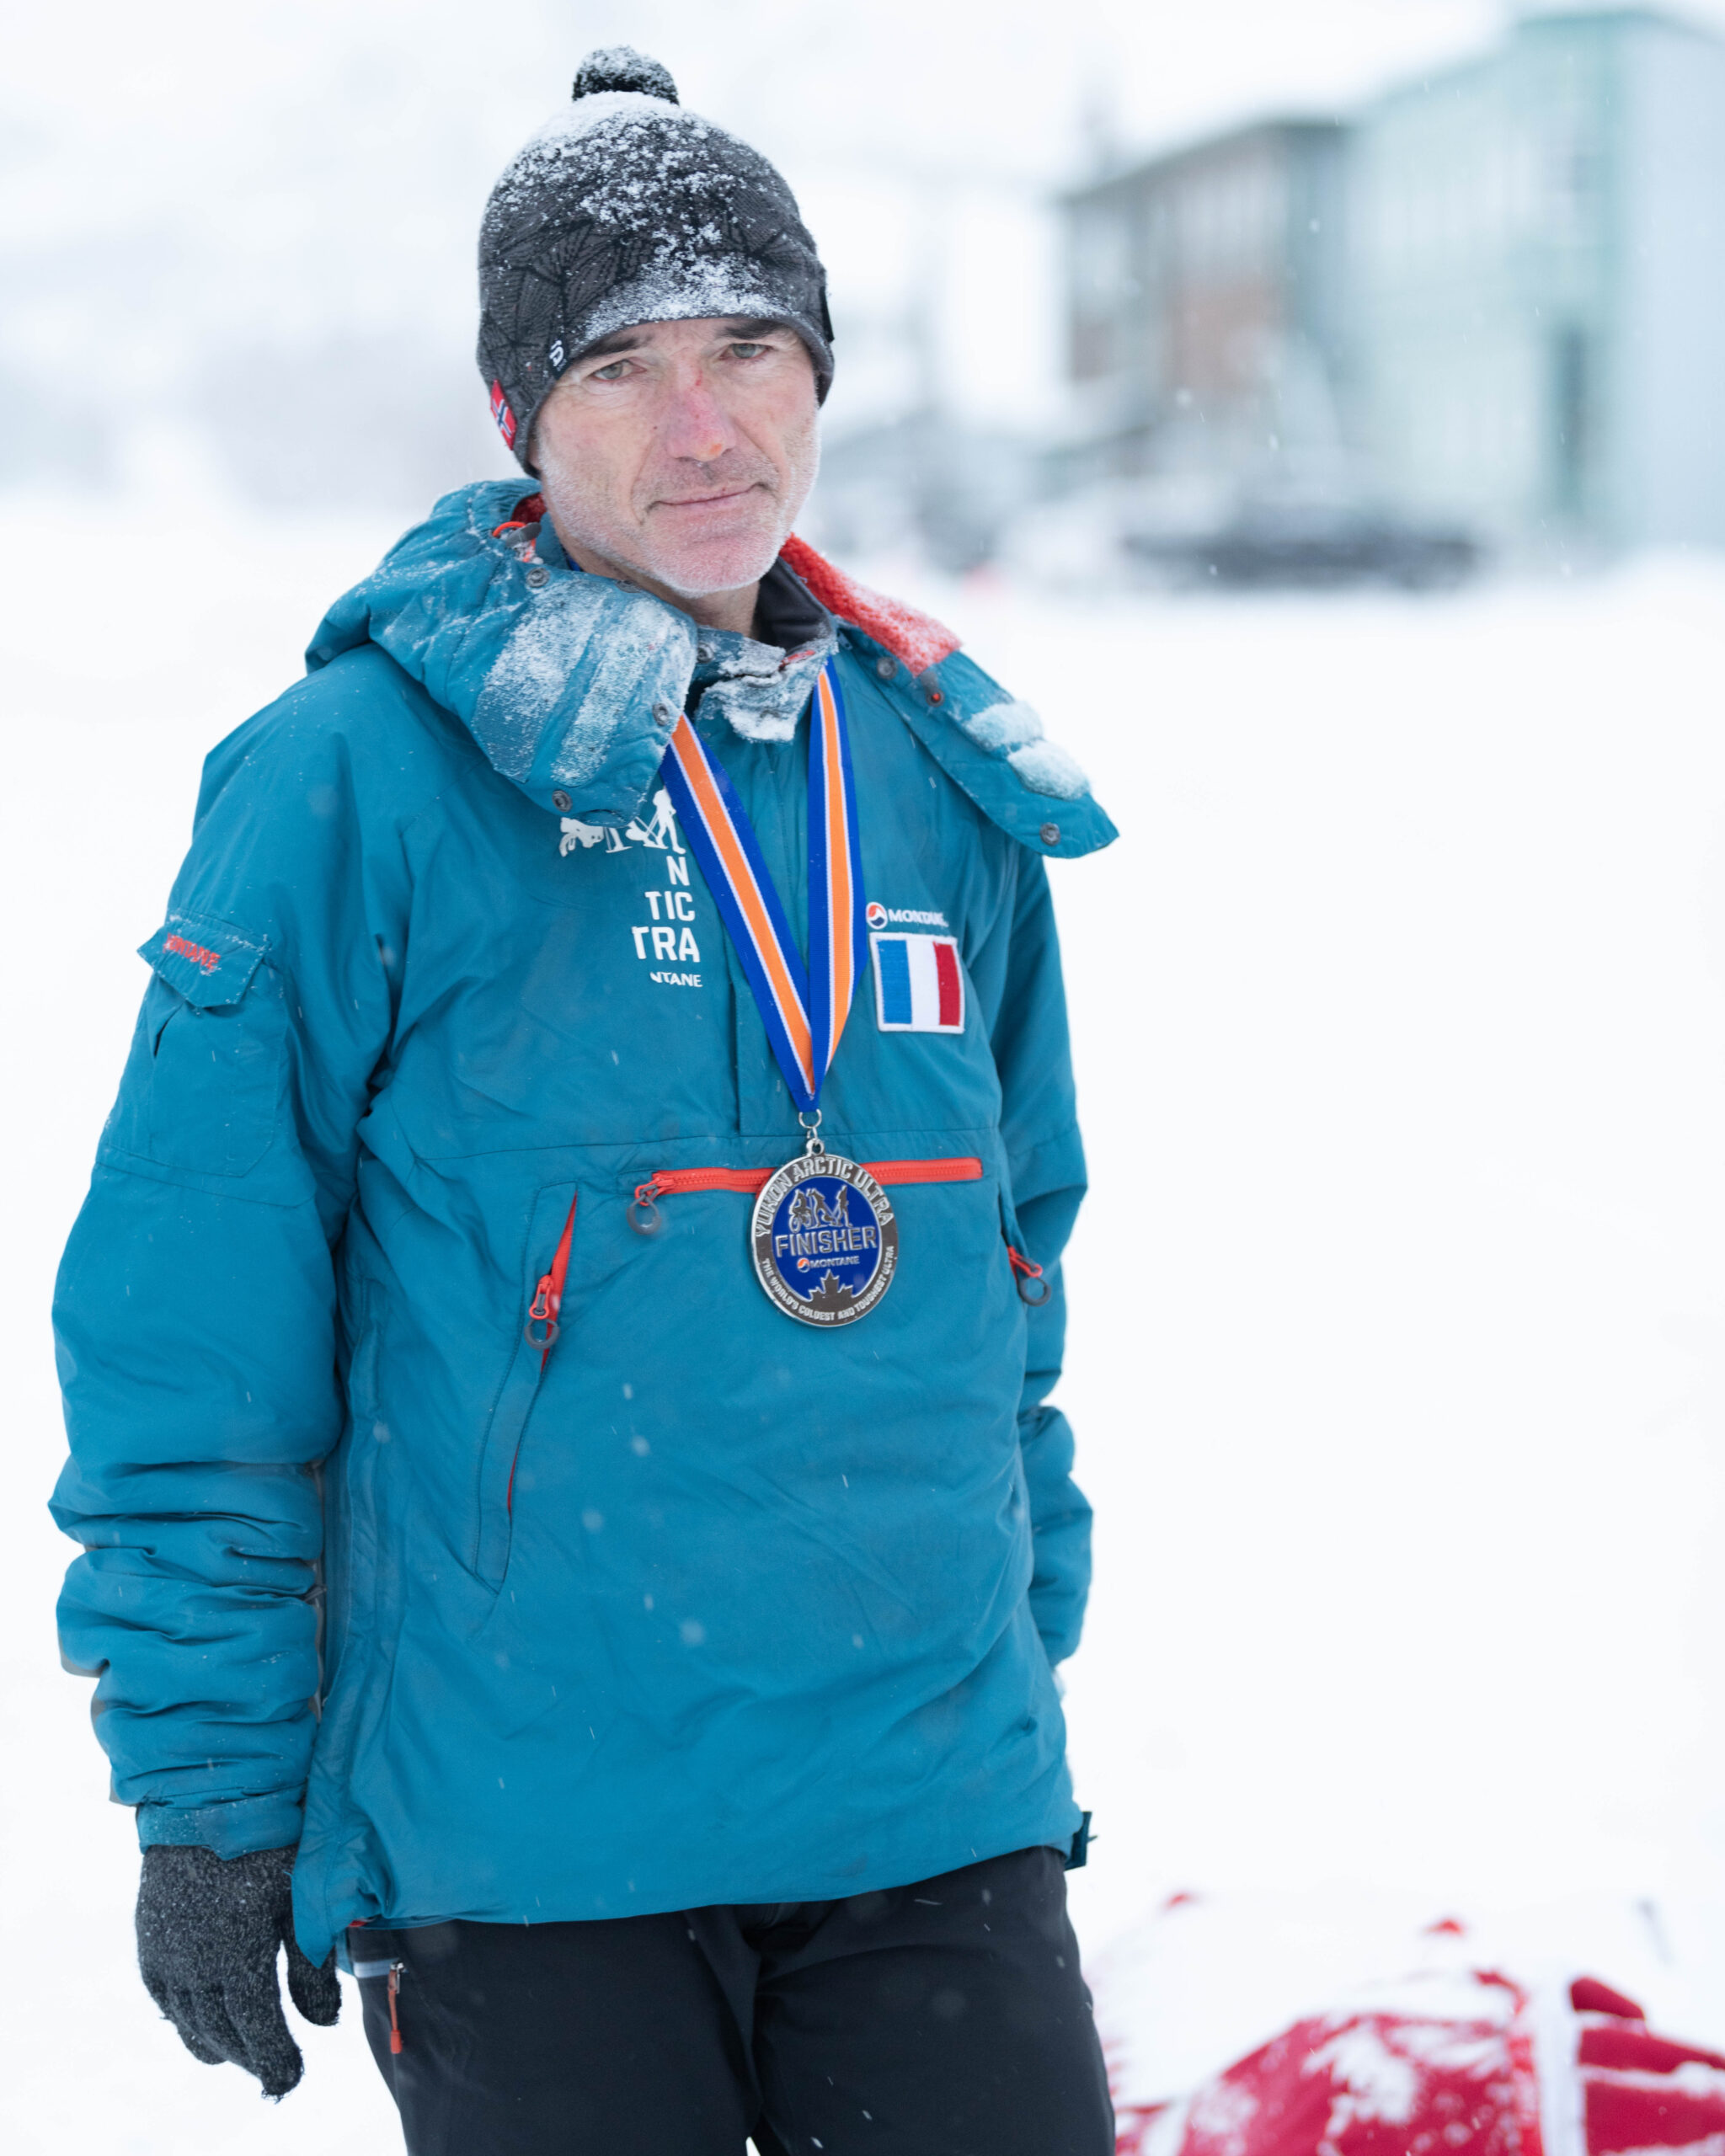
The image on the right shows Thierry Corbarieu at the YAU 2019, using a Montane Extreme Smock and winning the 430 mile distance – captured by markkellyphoto.com.

Should you not be able to get one your size or want to look at alternatives, there is also Buffalo, making products with the same idea, i.e. windproof outer and deep pile liner.

I still have some Montane Extreme Smocks and Jackets in stock, too. If you are interested, please get in touch.

Clothing – 3rd layer/shell

The third layer has to protect you in the harshest of conditions when you are still on the move and your body generates heat. Normally this means you are looking for something that keeps the wind and snow out.

The more breathable the layer, the better. Jackets with less breathability usually feature pit zips which help with temperature regulation.

If you can put on and take off your third layer pants without taking your shoes off it will be a lot more convenient for you.

As always keep in mind how your layers work together and think about the options you have. Sometimes your third layer can of course also be used above your first layer, e.g. you are perfectly fine with your first layer (winter running tight and thin fleece) but on a lake crossing it gets a bit windy and cold. Here you may just opt for putting on your windproof pants and jacket.

The lighter you go, the less robust your clothing will be. And lightweight may result in better breathability but it may also be the total opposite. Check out the water column und breathability (so called MVTR) if the manufacturer states these values.

Never forget: no matter how many layers you wear, try to avoid sweating! And if your third layer is wind- and waterproof it may not be as breathable. Then you need to take it off in time. Otherwise, your clothing will freeze on you as temperatures drop and you will be in big trouble before you know it. This is even more so important if you don’t carry any more spare clothing in your sled or on your bike.

Waterproof pants Some years ago I would have said that waterproof pants are not needed or don’t make much sense. We used to hardly get any snow and if so it would be very dry. Now we can get snow and it can be wet snow – even rain is a possibillity. We have not seen rain during the race but there was one winter that had a couple of days of rain just before we started.

Also, fabrics have been getting more and more breathable, light and often waterproof pants have zips along the sides for ventilation. So, if you do take waterproof pants, that’s what you want, a light fabric, ventilation on the sides and a zip that allows you to put the pants on and take these off, without having to take off your shoes.

Of course these pants also need to fit over your 1st and 2nd layers and be robust enough for winter use – in other words your lightweight waterproof pants for trail running may not do the trick.

As a reference product, we can pick the Rab Downpour Mountain Waterproof pants. A hydrostatic head of 20,000 mm is sufficient and the MVTR of 20,000g/m²/24 hrs is good. The 40D Pertex® Shield 2.5-Layer fabric offers enough robustness.

271 g
(size M)
Waterproof jacket The factors to consider the waterproof jacket are very similar to the pants. You want light but still robust and large enough to fit over other layers – including down jacket. No matter how breathable the jacket is on paper, pit zips are useful because in a waterproof you will start sweating sooner or later.

If you wear your harness over the jacket there is a good chance there will be some abrasion. The problem is if you want to avoid that with a reinforced GORE-TEX® Pro- type jacket, not only are these very expensive but usually also on the heavy side.

Somewhere between those two “extremes” is a jacket like the Montane
Torren Waterproof Jacket. It is very breathable, has got a hydrostatic head of 20,000 mm and is robust enough; plus it features pit zips.

425 g
(size M)

Other options / Things to consider

If you do go for a windproof instead of a waterproof, that is of course acceptable. But then you should have a back-up solution if the windproof layers get to their limit – maybe an ultralight waterproof poncho?

Obviously, you can make your choice also dependent on the weather forecast, e.g. great weather for all of your race means winproof may be enough. Or great weather at the beginning may mean you can put your waterproof layers in the drop bag and you start with windproof instead.

Softshells usually are comfortable and breathable, while still offering good weather protection. All very useful when being out all day. However, softshell might be heavier than other solutions …

Saving weight

If your sled weight is too high, the 3rd layers may play a role in it and give you some possibilities to improve. As is the case with any equipment, going very light will come with drawbacks. #1 Less features. Less weight may be achieved by no zip or a shorter zip, no pockets and so on. And that may be totally fine but is worth keeping an eyon on. #2 Less robustness. Some light fabrics still are pretty robust but obviously a heavy duty fabric, maybe even with some reinforcements, will last a lot longer than thinner and lighter fabrics.

Clothing – Gloves/mitts

In order to survive in extremely cold conditions you need warm, functioning hands. This goes especially for emergencies. If you need to build a fire and or light your stove and your fingers are frozen your chances to get through the situation without major problems are very slim. So, here is some advise on gloves/mitts:

  • Even with really good mitts it may happen that your fingers get cold. Chemical heat pads, which many places in Whitehorse sell, may help. But be careful if too hot these heat pads may cause other problems.
  • Always know where your gloves are. When you wear them, secure your warmest mitts with a string to your jacket. After a bivouac or other breaks and when leaving a checkpoint, make sure you do not leave behind your gloves.
  • If you bivvy take the gloves with you inside the sleeping bag.
  • Be careful when you are trying to dry your gloves (or any clothing for that matter) over an open fire.

The Rules of the YAU do not state how many and what gloves to take. The only thing that is listed are “Expedition Mitts”. Most big brands have these in their range. On the rest, it’s a matter of personal preference. It’s safe to say that it’s better to have one glove or mitt too many than not enough!

Lightweight liner gloves Similar to the layering for our upper body, you want something that’s think, wicking and breathable.

Because liner gloves are so thin, they are also more “fragile”. So, if you do a lot of tasks with them, they may not withstand that for very long, e.g. if you are handling your stove, preparing camp, etc. with your liner gloves they will get wet and may fall apart. It’s not a problem if you have back-up. Otherwise, for “work” it may make sense to switch to more robust gloves.

You have a choice from a wide range of fabrics – silk, merino wool, synthetic. From super thin to thin.

Extremities make various liner gloves and as an example I will take their Thinny Tough Gloves from 100% Acrylic. These are one size and weigh 66 g per pair. Simple and cheap. Only disadvantage, they don’t handle contact with velcro very well. Very thin merino or silk liner gloves may be a bit lighter but not by much.

40 – 70 g (pair)
Thin finger gloves Of course there is a VERY wide range of finger gloves. You will likely end up using a couple of different ones – depending on temperatures and it’s always good to have some back-up.

Depending on how cold it will be and how fast you get cold hands, you may be wearing these quite a bit. And you may use these a lot while using your poles. Therefore, you want something more robust.

Also, you likely won’t wear your liner gloves underneath – unless you happen to have a size that allows for liner gloves to fit. In any case, you want these gloves to feel comfortable agains your skin and it will be good if they transport moisture away quickly.

Something like the Extremities Revert Glove is maybe too light for some. But it has some great features – including a stowable water-resistant over-mitt stored in the cuff. It’s also windproof and of course overall warmer than a liner glove. At the same time it is thin enough to maybe fit under a mitt.

An interesting alternative are thin waterproof gloves – again, from Extremities or brands like SealSkinz and DexShell. These will retain body heat better, keep the wet out BUT of course also are less breathable.

108 g (pair/size L)
Thick finger gloves Again, you may use these quite a bit. So, you want robust materials. If you have ski gloves, they would do the trick.

From Montane’s range, this could be the Supercell Waterproof Gloves. “Blending highly breathable, waterproof PETRICHOR TECHNOLOGY with the durability of GRANITE Stretch, this highly protective glove is both tough and highly dexterous. Lined with SHERPA pile fleece for fast drying warmth, the reinforced goat leather is designed to lock out the elements keeping hands comfortable and protected.”

200 g (pair/size L)
Warm mitts You can of course do a similar thing with mitts when it comes to thin, medium and thick. But that’s maybe taking it a bit too far. Unless of course, you have different mitts and simply put some in your drop bag, just in case.

The pair you definitely want with you is when your warm finger gloves don’t cut it and you need to go one level warmer. I will take the Montane Extreme Mitts as an example. These feature a really good combination of materials (PERTEX® QUANTUM outer, 100g/m² PrimaLoft® Gold 55% recycled insulation on back of hand and DRYACTIV 2000 deep pile lining). A the same time they are light.

145 g (pair/size L)
Expedition mitts When your warm mitts fail, you can boost your system by using hand warmers and/or it’s time to get out your expedition mitts. Mind you, these should be your last resort. Obviously, when that’s the only thing that keeps your fingers warm, put them on. But if you need your expedition mitts at – 20°C, it’s a warning sign. What will you do when temperatures go to the extremes?!

Also, keep in mind that doing things with these mitts on is not easy and in many cases, impossible. So, you should have a layer inside these mitts that allows you to do quick jobs.

When conditions are extreme, you can beef up our system with hand warmers and it may be interesting to have wristwarmers. Sportees in Whitehorse make wristwarmers with pouches for handwarmers – VERY GOOD idea!

When it comes to the expedition mitts you don’t want to compromise. If temperatures go down to – 50° C, these mitts are what will keep your hands from freezing. So, we are talking about the same kind of mitts mountaineers wear on Everest or polar exlorers would use. Let’s take the Rab Expedition 8000 Down Mitts as an example:

“Our specialist expedition mitts are built for the most extreme conditions where you can expect the harshest weather and the coldest temperatures, whether you’re summiting an 8000m peak or crossing the polar ice caps. Designed to provide ultimate warmth at a low weight and without too much bulk, these are our highest performing mittens.”

280 g
(size L)

Other options / Things to consider

As mentioned above, it is fairly easy to lose gloves/mitts! So, do make sure you always know where you have your gloves/mitts and that you are not leaving without them.

It is also very easy to get your gloves wet and it may not seem like much of an issue at first. However, when your gloves/mitts are wet on the inside or all the way through, that’s what will accelerate the process of you getting frostbite.

Some people like to include a vapor barrier liner in their setup. That’s to prevent moisture from getting to the insulation of your gloves/mitts via your hands. I have not tried that myself, yet. I just don’t like the idea of having wet hands all the time but I am not saying it’s a bad idea. You can obviously try it but you should have a plan B if you don’t like it, either and/or it does not work for you.

Saving weight

As already mentioned above, saving weight means having all the gloves/mitts with you that you need to be save. Back-up gloves that you don’t need, should be in your drop bag.

When it comes to back-up gloves that you do want to have with you, it’s worth looking into some lightweight products. I am a big fan of PrimaLoft®-filled gloves, e.g. Montane Respond Insulated Gloves. These only weigh 65 g but are very comfortable and suprisingly warm. In addition, the pack size is minimal. Also available as mitts.

Clothing – Gaiters

Gaiters are not a must as we normally don’t get massive amounts of fresh snow. But even with a bit of fresh snow and drifting snow on lakes or rivers it can be nice to keep the snow out of your shoes that way. Or maybe you want to bivy off the trail and the snow is deeper there. In extreme conditions gaiters also bring a bit of insulation.

A breathable material is useful but of course any gaiters can quickly result in moisture building up. Another tricky thing is that almost all “alpine” gaiters do not fit over running shoes. Gaiters that are made for trail running focus more on debris and not so much or not at all on snow. So, if you do get alpine-type gaiters, make sure you test the fit. Should you get running gaiters, these likely won’t keep moisture out too well or for very long.

Light waterproof gaiters Kahtoola makes the LEVAgaiter GTX. It is interesting because it is very light, super small in pack size and the fabric is soft. However, as mentioned above, it may not fit perfectly over running shoes. So, if you have a light hiking shoe or a cross-over between hiking and running shoe, it may work. Otherwise, it may be just as “bad” as other alpine gaiters and let too much snow in via open areas at the bottom sides.

130 g
(size M)

Trail running gaiters When it comes to trail running gaiters, there are quite a few options. I am a big fan of the Kahtoola RENAgaiter. They are very robust, still light and small in pack size and feature an incredibly good fit. Also, you can change the size via the DuraLink® Instep Strap. The side zip closure is useful, too. Thanks to it you can put them on and take them off without having to take off your shoes.

I do use these gaiters in snow and it is surprising how well they keep the snow and moisture out. However, the fabric is not waterproof. So, so moisture will get in at some point.

The Mid-version will makes sense in winter.

104 g
(size S/M)

Other options / Things to consider

There are now also many trail running shoes on the market that actually have an integrated gaiter. Should you have a shoe like that, you don’t need gaiters. Just beware that some of these trail running shoes with gaiters also feature spikes. That’s great if you are on ice but it will cause damage to snowshoes.

Saving weight

If the trail is rock solid, there are no winds or snowfalls in the forecast and you do a distance with a drop bag, you can leave gaiters in the drop bag.

Kahtoola also make the INSTAgaiter. In the size S/M these only weigh 56 g in the low version! They are less robust but do last pretty long and do keep the snow out pretty well.

Clothing – Head/neck

The head is important for the temperature regulation of your body. So, be careful not to lose your hat(s).

You need a functioning solution for the worst conditions and the real cold. Which is a challenge because as soon as you cover your mouth and nose with fabric you will start creating an ice mask, even if there are holes for breathing in the fabric. And there is not much you can do against it apart from taking the ice off or in case of the neck gaiter to keep turning it.

Problem areas are nose and cheek. You may not feel too cold but your nose and cheek already have a frostbite. And frostbite means your race is over even though you otherwise feel great. There is special tape on the market (Frost Tape) and some people even just use duct tape. Not sure what dermatologists would say about that though … ColdAvenger masks also seem to work quite well for some people.

Thin beanie There are plenty of options there. I personally like Polartec® Power Stretch® or similar. Something that is thin, stretchy, light and very breathable – like the Rab Powerstretch Beanie.

Other light options are Polartec® Power Dry® beanies and/or a Buff®.

29 g (one size)


Windproof beanie There are variations of windproof beanies. Some are actually pretty thin and/or only feature a windproof headband. While others can be fairly substantial and/or be fully windproof, i.e. not just a headband.

For our list I will take the Montane Windjammer Halo Beanie as an example. It features an internal windproof GORE-TEX WINDSTOPPER headband to keep your ears warm.

Whatever you get, do make sure it fits your head well and does cover the ears fully.

40 g
(one size)

Insulated cap or hat The next level is something that is definitely 100% windroof all over. At the same time it’s great of it does not weigh much. Also, it should be one step up in warmth. That can be achieved by a windproof outer fabric from PERTEX and some form of insulation – synthetic or down.

Montane Insulated Mountain Cap features such a windproof outer from 100% recycled PERTEX® QUANTUM ECO with PFC-free DWR and 60 g/m² PrimaLoft® Silver insulation. Still it’s very light.

40 g (one size)
Balaclava Just as there is a wide choice of hats, there is also a wide choice of Balaclavas – from thin to thick, windresistant, partially windproof or fully windproof.

The Montane Punk Balaclava is “constructed from zoned Thermo Stretch fleece fabric and windproof PERTEX® QUANTUM, it offers enhanced protection in critical areas. Enhanced nose ventilation for easier breathing and a raised peak for better visibility offer advanced performance.”

60 g
(one size)

Other options / Things to consider

What’s missing here are neck gaiter, sun glasses and ski goggles. The latter you will need if the weather is so cold/bad that all of your facial skin needs to be covered.

If you wear glasses things become more difficult. These fog up really easily when using a neck gaiter or balaclava. Day lenses may be a solution. Even if you have perfect eyesight, sun glasses and goggles can of course fog up and irritate you. This can also be a first sign that you may need to adjust layers because you are generating a lot of heat.

Saving weight

The good news is of course that hats don’t weigh much. So, it’s typically not one of the areas where you can make a lot of “mistakes” or safe weight. Still, it all ads up and you obviously do not need 10 hats, 5 balaclavas and 3 neck gaiters …

When you think about what hats you need and want to use in certain scenarios, you should factor in the jacket(s) you will be wearing – most of these will have a hood!

Clothing – Socks

No matter what socks you go for, make sure you test as much as possible. While moving and in “normal” temperatures a warm running sock (no examples above) may be all you need. When it gets really cold or when you stop moving you will likely need more warmth.

Waterproof SealSkinz or DexShell socks are not a must but these sure have worked well for a lot of participants. If you get some, test as much as you can. The fit is good but not comparable to that of a regular sports sock. So, you may want to wear running or liner socks underneath. In any case it’s a thick layer and may influence your choice of shoe size.

Liner socks The purpose of a true liner sock is to get mositure away from your feet and to help take friction away from your skin by combining it with a sock above it. These socks usually are very thin and don’t have many other features. That means on their own, they are not the best socks to wear while hiking and running.

There are also toe liner socks like the injinji® Performance Liner Crew. They do have one more feature which is to help you prevent problems between your toes, like blisters.

Trail running socks When you are “just” wearing one layer of socks, it’s better to count use trail running socks. These come of course in many different variations. It’s likely you won’t need the very thin, summer type running socks. When it comes to the medium weight versions, you can use whatever brand and model you trust.

If you don’t already have a couple of pairs, maybe also look specifically for winter running socks. Some companies offer those, like La Sportiva and X-SOCKS.

Hiking and trekking socks When it comes to thicker socks, you may want to also have a look in the sector of hiking and trekking.

Hiking and trekking socks will likely also be the better choice if you have footwear that covers your ankles.

Very warm socks Of course there are also very warm socks on the market that are not specific to a certain type of footwear or sport, e.g. Woolpower Merino 200 socks. And if that’s not warm enough, they also make a 400 and 600 version.

Obviously, the thicker the socks, the tighter it will be in your shoes. Beware that, once the fit is too tight and the flow of blood is constricted, things get counter productive. So, it is of course important to have very thick socks BUT these need to still fit well in the shoes you are wearing.

Waterproof socks There are good waterproof 3-layer socks from different brands, SealSkinz and DexShell are two of them.

Both companies make many different models – from thin to very thick and for different kinds of activities.

Since I am a big fan, I do like to have a thin version, a medium one and a rather thick one with me.

Breathability is limited – which is great if it is extremely cold as your feet do not get cold. But when it warms up your feet may start sweating, eventually causing bad blisters.

Other options / Things to consider

Waterproof are not a must but these sure have worked well for a lot of participants. If you get some, test as much as you can. The fit is good but not comparable to that of a regular sports sock. So, you may want to wear running or liner socks underneath.

Thick socks may influence your choice of shoe size. Keep in mind that – as is typical in ultras – your feet will be swell up over time.

If you use compression socks during recovery time and it works well for you, these can be part of your kit in the Yukon, too.

Some people like to use Vapor Barrier Liner socks – RAB and Exped make these. Obviously, this will result in soaken wet feet. That in turn can cause trench foot and/or bad blister resulting in a DNF. So, if you are using VBL socks, make sure you keep an eye on it.

In (extremely) cold conditions it’s not only important to keep your feet warm but also dry. This may mean more frequent sock changes than you would normally do. If you wear thick socks, your feet are wet and the temperature drops, you can easily get frostbite on your toes.

No matter what you do, in an ultra it’s still possible to get blisters. Apart from having the best possible combination of sock(s) and shoes, you need to constantly monitor yourself. If you feel a hot spot may be developping, do stop and deal with it. Don’t wait until you reach a checkpoint.

I am not mentioning socks for fatbikers and those of you going on skis. I am simply not an expert here. Some socks will be great for all three disciplines but there may also be some ski and bike specific socks that I am not aware of. I would think that VBL may also make more sense or be easier to use for fatbikers. For both, skiers and fatbikers, keeping their feet warm is more challenging than it is for those on foot. I recommend asking other athletes with experience to hear what strategies they have developped when it comes to socks and ways to keep their feet warm.

Saving weight

As is the case with gloves or hats, there is not hugh potential for weight saving here. But obviously, you can make good use of your drop bag when it comes to socks. No need to carry all socks with you all the time.

Also, keep an eye on the weather forecast when you plan the amount and type of socks you will take with you until you have access to your drop bag again.

WrightSocks

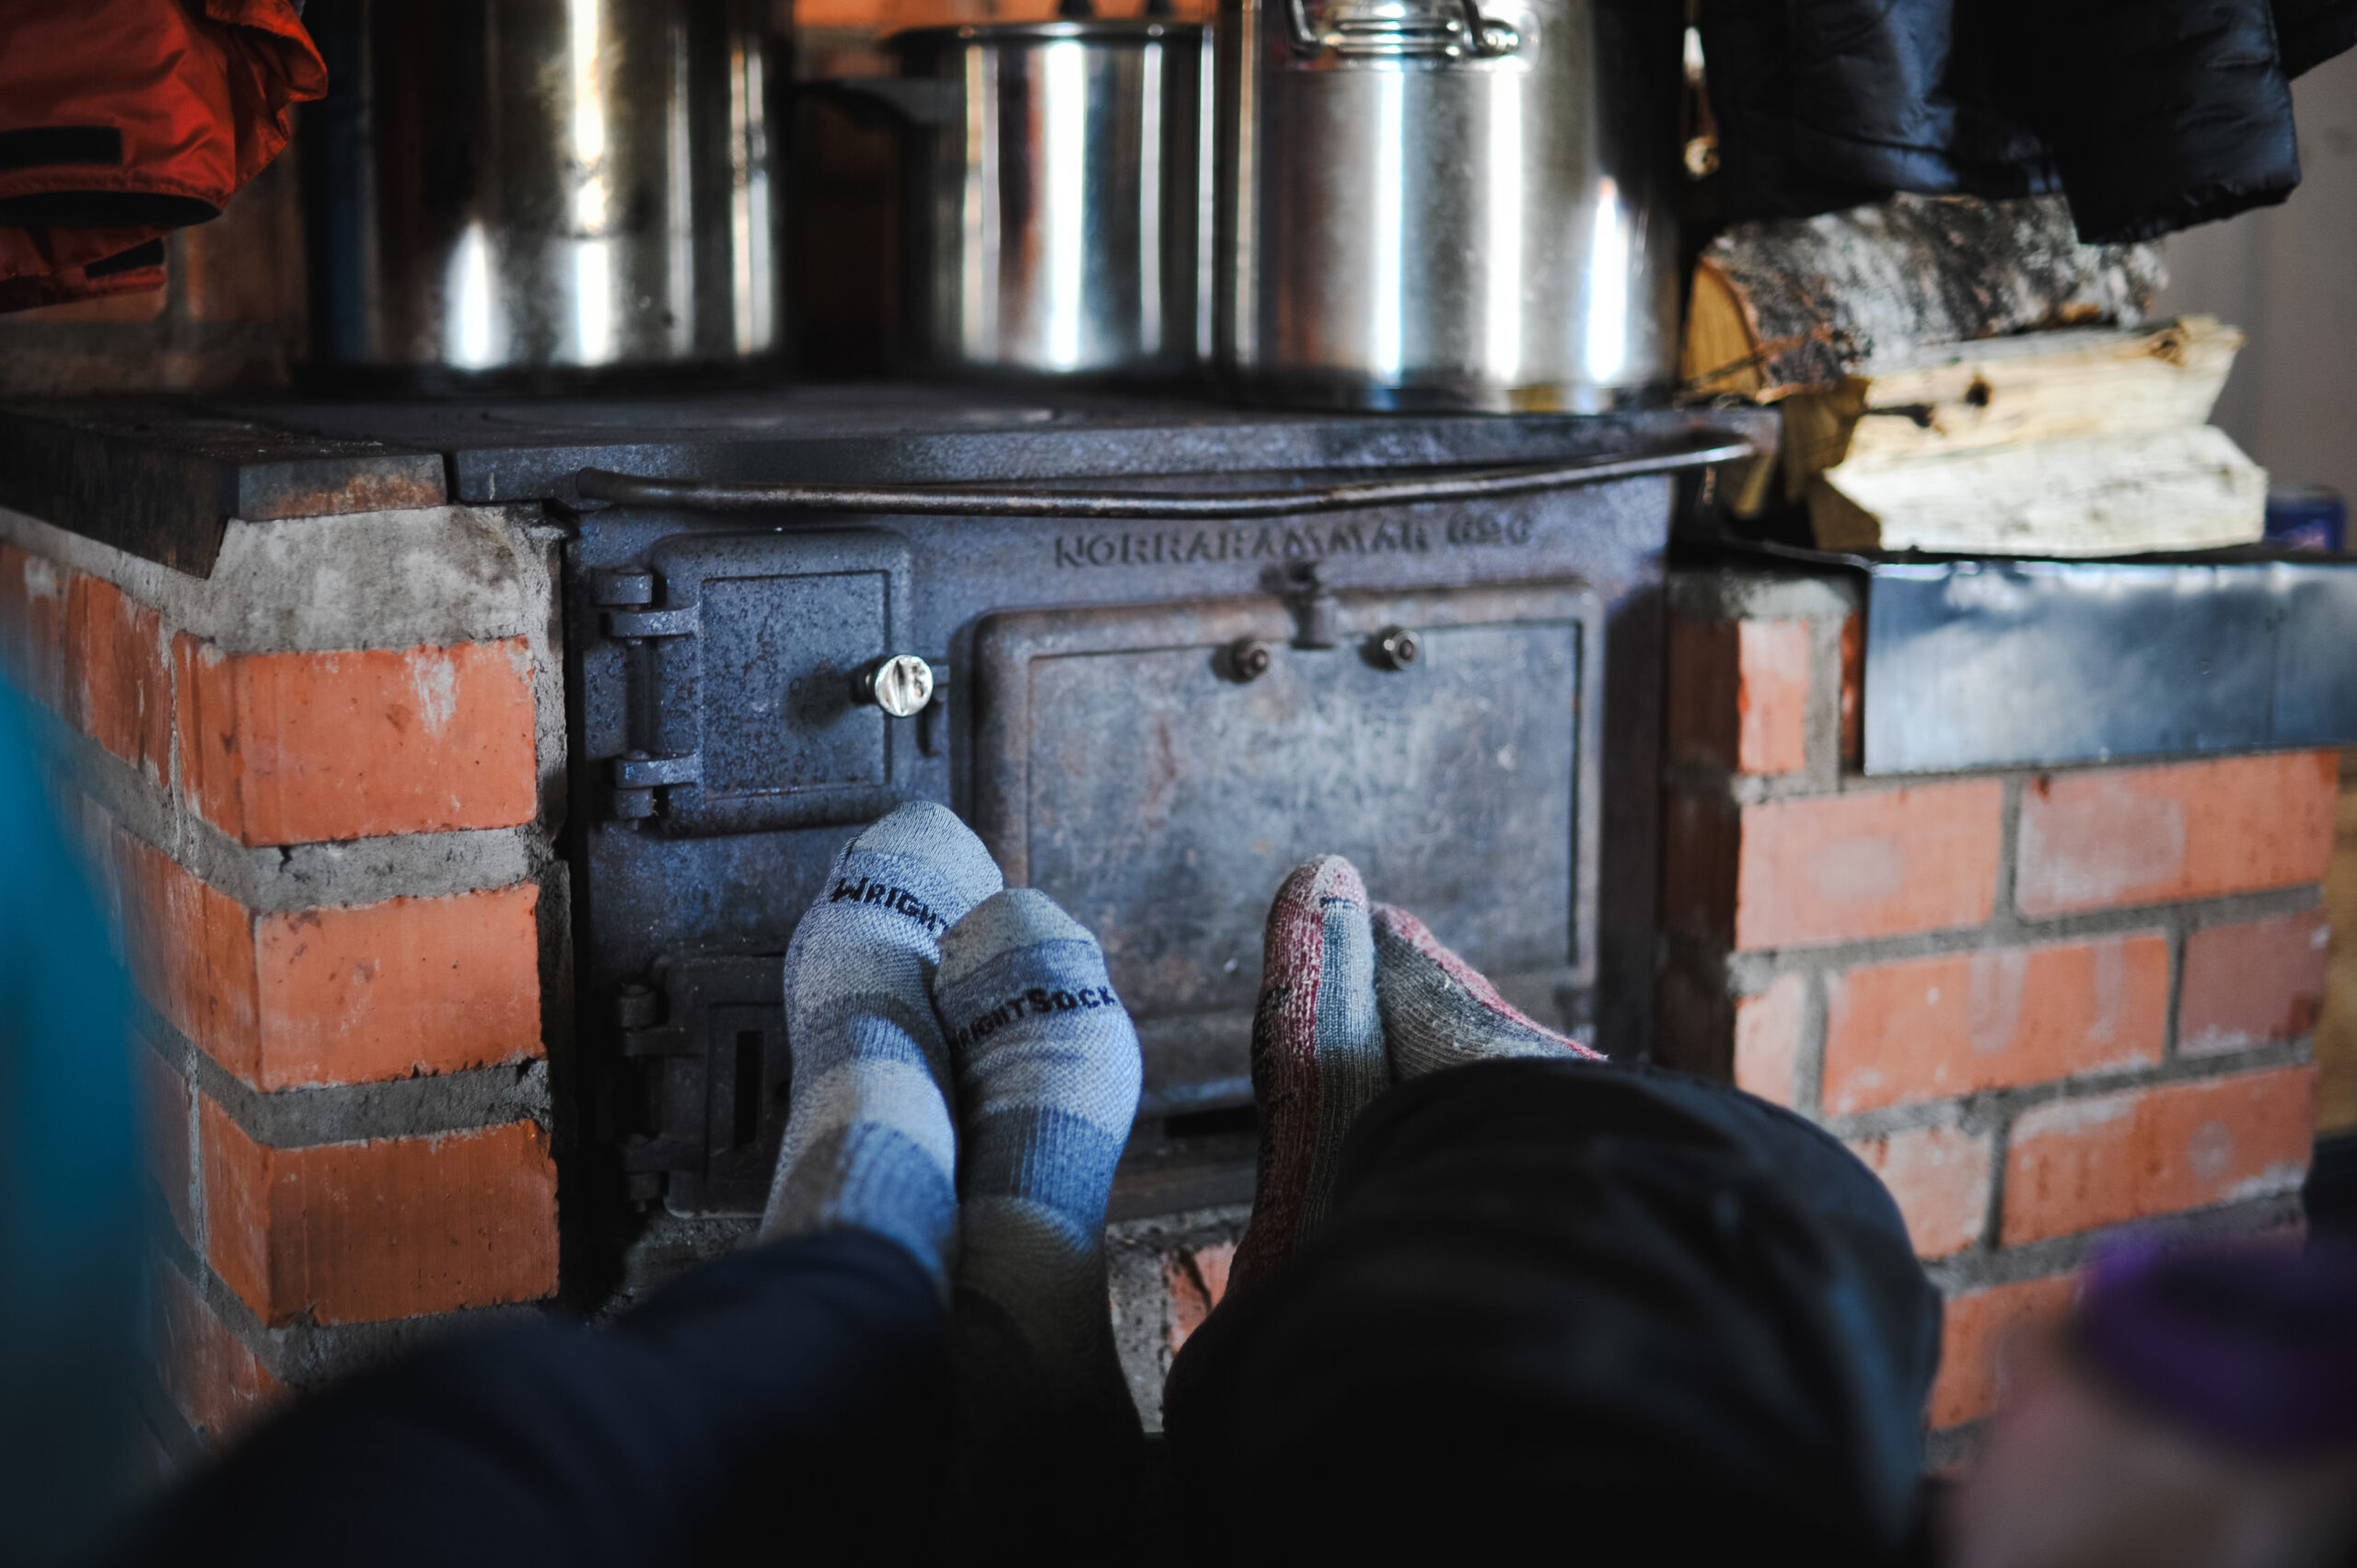
I am a big fan of WrightSock. These are the best double layer socks on the market. They have different thicknesses and lenghts but all have one thing in common: a really thin first layer that transports moisture away from your skin. If you have tried these before, you know exactly what I am talking about. If you are new to the brand, I strongly recommend you give it a try. The construction also helps to prevent blisters. Mind you, these socks are not a guarantee against blisters but under normal circumstances they will delay the problem.

First Aid

You should spend some time and think about how the cold impacts the contents. Maybe certain things need to be close to your body heat or warmed up to work? If in doubt as your doctor or a pharmacist.

Like in most ultras blisters are a problem at the YAU. Ideally you do something about it before it gets bad. If you do not know it already, find out how to prevent and treat blisters.

The YAU has a medical team and they are happy to help. But they may be busy dealing with an emergency and have no time to treat every little blister. So, please be prepared to deal with less compliated medical problems (and blisters are in that category) yourself. You also need your own kit to treat blisters. The medical team has got very limited stock.

It makes sense to have your first aid kit in a waterproof bag.

First Aid Kit There are many ready outdoor first aid kits on the market. It can make sense to buy one as your basis and then “update” it as suggested above. If you do that, think about what size you need and it is interesting to get one that is waterproof.

An example would be something like the Lifesystems Mini Waterproof First Aid Kit. They also just sell a waterproof first aid kit bag which weighs 50 g.

242 g
Blister Kit Again, Lifesystems make a Blister Kit. But of course there are others and/or you can of course buy the components separately and add to your First Aid Kit. 75 g
Emergency whistle I recommend the one and only ACME Tornado 2000. It’s probably the world’s loudest whistle. 10 g

Other options / Things to consider

Prevention is key. That goes also for the very common “ultra problems” of chafings and blisters. It is always worth stopping and dealing with an issue before it turns into a problem.

You should spend some time and think about what it is you really need or how the cold impacts the contents. Maybe certain things need to be close to your body heat or warmed up to work? If in doubt as your doctor or a pharmacist.

First aid may also mean that you need to build a wood fire really quickly. Therefore, you should have different fire starters and means to light a fire with you. And it makes sense to pack these in different places.

Saving weight

Instead of buying a complete first aid kit which contains things you do not want, you should go by your experience and get what you really need. That of course includes the items that are listed as mandatory first aid kit.

Skin care

Skin care is all about prevention. If you are good with it, you will need less kit in your First Aid Kit and it’s obviously much more fun to do an ultra with no or few blisters and chafing.

If you have the right clothing you have already done a lot for your skin care. But as is the case with any ultra, there are bound to be problems, e.g. with your feet or the harness of your sled. No matter what skin problem it’s good if you have what it takes to prevent or solve it. Or at least control it.

Lotions can help but beware that if you leave it in your sled it will freeze on you.

Body Glide There are other options on the market. Body Glide is the brand I am most familiar with. It works very well.

It’s easy to use skin protection (will of course only work if not frozen solid …). I especially like that it goes into your skin and does not work on the principle of creating a layer of “fat” on your skin …

69 g
Sun screen – face There are obviously tons of different sun screens on the market. It’s interesting to look into the ones that were specifically formulated for the cold/winter – like the mawaii WinterCare SPF 30. 50 g
Sun screen – lips Your lips will suffer. So, again, lip care specific to cold makes sense. Like the mawaii LipCare SPF 20. 25 g
Skin care – hands The dry and cold usually get to the skin on our hands – sooner or later. Something like mawaii HandCare – specific to winter – helps. Neutrogena Hand Cream with the Norwegan Formular is another one. 50 g
Foot Powder There is also a Body Glide for your feet. Another way to help keeping your feet dry is foot powder, e.g. Care Plus Foot Powder. 66 g

Other options / Things to consider

Skin care is not just about lotions and creams. Hygenie is also important. So, whenever you get the chance for some (basic) personal hygiene, use it. You want that salt off your skin.

Wet wipes also can help. However, you need to warm these up before you can use them. If you leave them in your pulk, they will be frozen solid.

Another important factor is drying your skin – especially your feet – as often as you can; especially if your feet are wet, no matter what socks you use.

Cooking

Some try to avoid using a stove whilst others really enjoy the break and getting something hot to drink in between. But even if you do not plan on using your stove you need to know how to handle it and possibly repair it.

Keep in mind that you need to be able to wear a thin glove while lighting your stove.

While gas stoves are easier to handle these will not work reliably below – 20° degrees. Therefore, according to the rules these are not allowed.

Alcohol stoves fairly easy to light and pretty reliable. However, they are not efficient when it comes to melting larger volumes of water. Therefore, just like the gas stoves, these are only allowed as a back-up solution.

Multi-fuel expedition stove The Primus OmniLite TI is probably the lightest in its category. The MSR XGK EX is the most reliable.

Obviously, if you have another product of choice and know it will work in extreme temperatures, there is no need to change – if the weight is not too high.

239 g
Fuel bottles Available in a range of different sizes

from 325 ml
= 92 g

Pot It can be interesting to consider a set like the Sea to Summit Alpha Set 1.1. This comes with a pot with 1.2 litre pot and includes a Delta Light Insulated Mug and Delta Light Bowl. These are not from Titanium. So, you can go lighter! 330 g
Mug If you are getting a mug, get a double wall product, like the MSR Titan Double Wall Mug. It will keep your hot chocolate and coffee warm for longer. 116 g
(Long) spoon If you will be eating expedition meals out of bags, you will want a long spoon, not just a regular length spoon. Much better to eat that way. One example is the Sea to Summit Alpha Light Long Spoon. 12 g
Matches or lighter  It is part of the rules that you need 2 sets of outdoor matches in waterproof containers. That’s the minimum. You can consider to take fire steel and/or outdoor lighter in addition.

Fire steel is great because it does work in almost all circumstances. BUT you need to train it. It’s not as easy as it may look.

Regarding lighters, only the really good ones will make sense and even those can fail in extreme conditions.

approx. 2x 35 g

Other options / Things to consider:

While gas stoves are easier to handle these will not work reliably below – 20° degrees. Therefore, according to the rules these are not allowed.

Alcohol stoves fairly easy to light and pretty reliable. However, they are not efficient when it comes to melting larger volumes of water. Therefore, just like the gas stoves, these are only allowed as a back-up solution.

If you have not used your liquid fuel stove in a while please test it before you leave for the Yukon. It may need some cleaning or maintenance. It is very important that you know how to do maintenance and simple repairs!

At the YAU we rent out the Primus OmniLite Ti and MSR XGK if you don’t want to worry about transport or buy a stove.

A pot with 1 litre may sound “big” and it is the minimum required by the rules. So, it’s fine to get by and/survive in an emergency. But if you plan on melting snow as part of your routine, you will want more volume.

Definitley get a pot that comes with a lid. It will make melting snow and/or heating up water a lot more efficient. It’s also great to scoop up snow.

Saving weight

Yes, titanium pots, cups and cutlery usually are the most expensive. However, if you are counting every gram, then it’s the material of choice. Obviously, if that’s not your priority and/or your overall sled weight is already at a low enough level, you can also pick other materials.

With the stove, it also makes sense to consider weight. However, it is more important to know that it will not let you down even in the worst of conditions.

You should only carry as much fuel with you as you know you will need. So, do your math (including some fuel for emergencies) and keep in mind the checkpoints where you will get a re-fill.

Instead of getting a separate mug, you can of course simply use the lid of your thermos – which normally is designed to be used as a mug. Just be sure you get it dry before you screw it on to your thermos again. Otherwise, it may freeze your thermos shut.

Sled

For those not on MTB the sleds is a vital part of your kit. If you want to save some money you can of course improvise and build your own hauling shafts and harness, use our own duffle bags, etc. Just make sure you really test your set-up back home. It can become a bit stressful having to deal with sled problems last mintute.

Some participants prefer rope for pulling the sled. It’s really up to the individual. I personally prefer hauling shafts because of stability and the easier handling on downhills. One big advantage of rope is of course that you can access your pulk without having to get out of your harness.

If you take a duffle bag or some other kind of bag to store your equipment on the sled, keep in mind that the snow in your sled may melt and get things wet from underneath. Also, if the bag has a zip it should be a good one, as small or bad zips in the cold may not work for long. And of course it were great if the bag is as light as possible.

Pulk sled For our example, I will go with a Snowsled Trail Pulk Shell, a plastic sled that has been very popular with athletes for many years.

It’s robust enough but of course requires a bit more caution when your load if very heavey and/or you plan to sit on your sled or ride it on downhills – especially in extremely cold temperatures.

It also won’t last forever as there are no runners that could be replaced. But the main argument for it is a lower price tag and low weight.

2.3 kg
Harness You can go with a harness from Snowsled as well.

Whatever harness you get, it’s important that it is robust and it makes sense to have a setup that works both with rope and rigid hauling shafts.

A big pro of the Snowsled combination of hauling shafts and harness is that the shafts clip onto the harness (rather than just a connection via carabiner).

470 g
(size L)

Hauling Shafts It’s fairly easy to improvise hauling shafts with some electrical pipe, robe, bungee and carabiners.

Or you can buy your hauling shafts, e.g. Snowsled, that are made from aluminium.

1.8 kg
Pulk Bag The pulk bag from Snowsled is very commonly used. It has no seams at the bottom in order to avoid water entry, a heavy duty and high quality coil zip with two sliders and grab handles at each. If you are using their sled, the straps will fit through webbing on the sides – which means your bag will stay in place and can be secured really well.

Rab also makes sled bags and the more expensive pulks, like Fjellpulken or Acapulka use a integrated sled cover instead of a bag. Which can be a bit of a disadvantage because you can’t simply detach a bag and carry it into a checkpoint.

830 g
Straps As mentioned above, Snowsled makes a set of straps that works perfectly in conjunction with their sled and sled bag.

Alternatively, you can of course also use a rope or bungees to do the same job.

290 g

Other options / Things to consider:

Be prepared for repairs. Your sled or parts of it may break or come apart. Think about possible problems and make plans how you would solve them. Do you need special tools? Spare parts? Screws and bolts?

Our rental sleds are mainly from Alaska Gear Company. We use these because they light but incredibly robust. Their sleds of course also can be purchased.

Organise your sled really well. It can be very frustrating if you always have to look for 10 minutes before you find what you are looking for. Use smaller bags in the big bag. Color code these.

Don’t load your sled to high and keep the heavy stuff at the bottom. If you don’t have the snowsled straps, get some other straps to keep your gear in place.

Participants of the YAU can rent sleds and accessories. That saves money and also the trouble of getting the sled to the Yukon and back home again. Check with your airline before booking how much they charge for bulky or sports luggage.

Saving weight

Obviously, there is quite a bit of potential for saving weight here. A Fjellpulken Mountain Touring 145 (cover included) weighs 6.4 kg. A snowsled Trail Pulk with bag and straps weighs in at 3.3 kg. It’s still tricky because most high quality, non-plastic sleds will glide better. And then of course you do need to consider that you will get A LOT more km out of a sled like the Fjellpulken Mountain Touring. But having said that, if the lowest possible weight is your goal, then you can’t beat a Snowsled, Siglin or similar.

It is of course important that not only your sled is light. If you take a plastic pulk sled but your load is super heavy, it won’t work well. A Snowsled requires a wooden base plate if the load goes over a certain limit. That will give it stability and keep it from breaking but then of course increases the weight even further.

Sleeping system

A mat and a bivvy bag or tent also are part of a sleeping system. Apart from that you should also use a liner and/or a vapour barrier liner (VBL).

The mat plays a very important role as your body weight will compress the fill of your sleeping bag. So, the only thing between you and the cold ground is the mat. There are many different options on the market. Don’t forget, even if you get a modern self inflating mat or hi-tech air mat, you still need a light foam mat. That way if your main mat does not work you have an emergency back-up.

We do use the lower comfort limit (EN 13537) temperature rating to determine what sleeping bag you can use (see rules). That’s still no guarantee for a pleasant night if it’s extremely cold. That is why not only your sleeping bag needs to work. And of course you can use your down jacket and other clothing to get some more insulation.

It also matters where you sleep and how you set up the place. How and where you build your fire, etc. Avoid cold spots (like lakes or rivers to rest), stay out of the wind. A fire is a good idea but be careful that you sleeping bag does not get too close to the heat. Flying sparks can also be a problem.

Tents have become more popular. However, at – 40 putting up and taking down a tent can be pretty difficult. Not every tent pole can handle these kind of temperatures. Therefore, if you get a tent, make sure it’s easy to handle and made for such cold temperatures. Have a solution for what you do if a tent pole does break. Should you decide to use your stove inside the tent beware that most manufacturers will tell you not to do so. It can be very dangerous.

Down sleeping bag The Cumulus Excuistic 1500 is a perfect example for a sleeping bag that is made for extreme winter conditinos. It features 1500 g of goose down with 900 Fill Power,  Pertex® Quantum Pro outer and liner – both with DWR finish, 120 cm, 5 mm YKK® zip with 2 self-locking sliders, Zip slider with anti-snag system and much more. 

We have Cumulus Excuistic 1500 and other bags of a similar standard availalbe for rent at EUR 249.00.

2,270 g
Sleeping mat The rules require a minimum R-Value of 6.  The Exped Ultra 8R features an R-Value of 8.8. It is rated to – 40 degrees Celsius.

We rent out Exped mats for EUR 60.

705 g
(size MW)

Vapour barrier liner The Sea to Summit Reactor Extreme Sleeping Bag Liner is very good. Its Thermolite® Pro fabric utilises innovative infra red-absorbing ceramic pigments to give your system a thermal boost. like the Rab Hooded Vapour Barrier Liner will keep moisture out of your sleeping bag’s down. However, it will also mean that everything within the VBL will be moist. You need to try it to see if you like it. 180 g
Sleeping bag liner Something like the Rab Hooded Vapour Barrier Liner will keep moisture out of your sleeping bag’s down. However, it will also mean that everything within the VBL will be moist. You need to try it to see if you like it. 355 g
Bivy bag Bivy bags have come a long way. There still are very simple solutions on the market. And there is the category of bivy bags that try to offer a bit more comfort for the head area, like the Rab Ridge Raider.

The big advantage is light weight and compact pack size. Plus of course less that can break. The disadvantage is that you have no extra space. It can be more tricky to get inside.

Available for rent EUR 99.

890 g

Other options / Things to consider:

If you opt for a bivy bag, make sure that it is big enough for the sleeping bag you have. Not all bivy bags are made for the large volume of very warm winter sleeping bags.

If you borrow a bag from a friend make sure it still has got its full loft. If the bag was stored in the stuff sack for a long time you will likely not be able to use it.

Saving weight:

Synthetic sleeping bags have gotten a lot better, i.e. lighter. But when it comes to packing size and warmth to weight ratio, down is unbeatable.

If you are looking into saving weight, the sleeping system does have potential. However, there are many “worst case scenario” where the right sleeping bag can make the difference between life or death. That’s why you should not compromise and why we do check your sleeping system as part of the mandatory kit check. What we particularly focus on is the loft of your sleeping bag. A down bag that does not loft well, will not be accepted.

Rab Latok Summit Tent

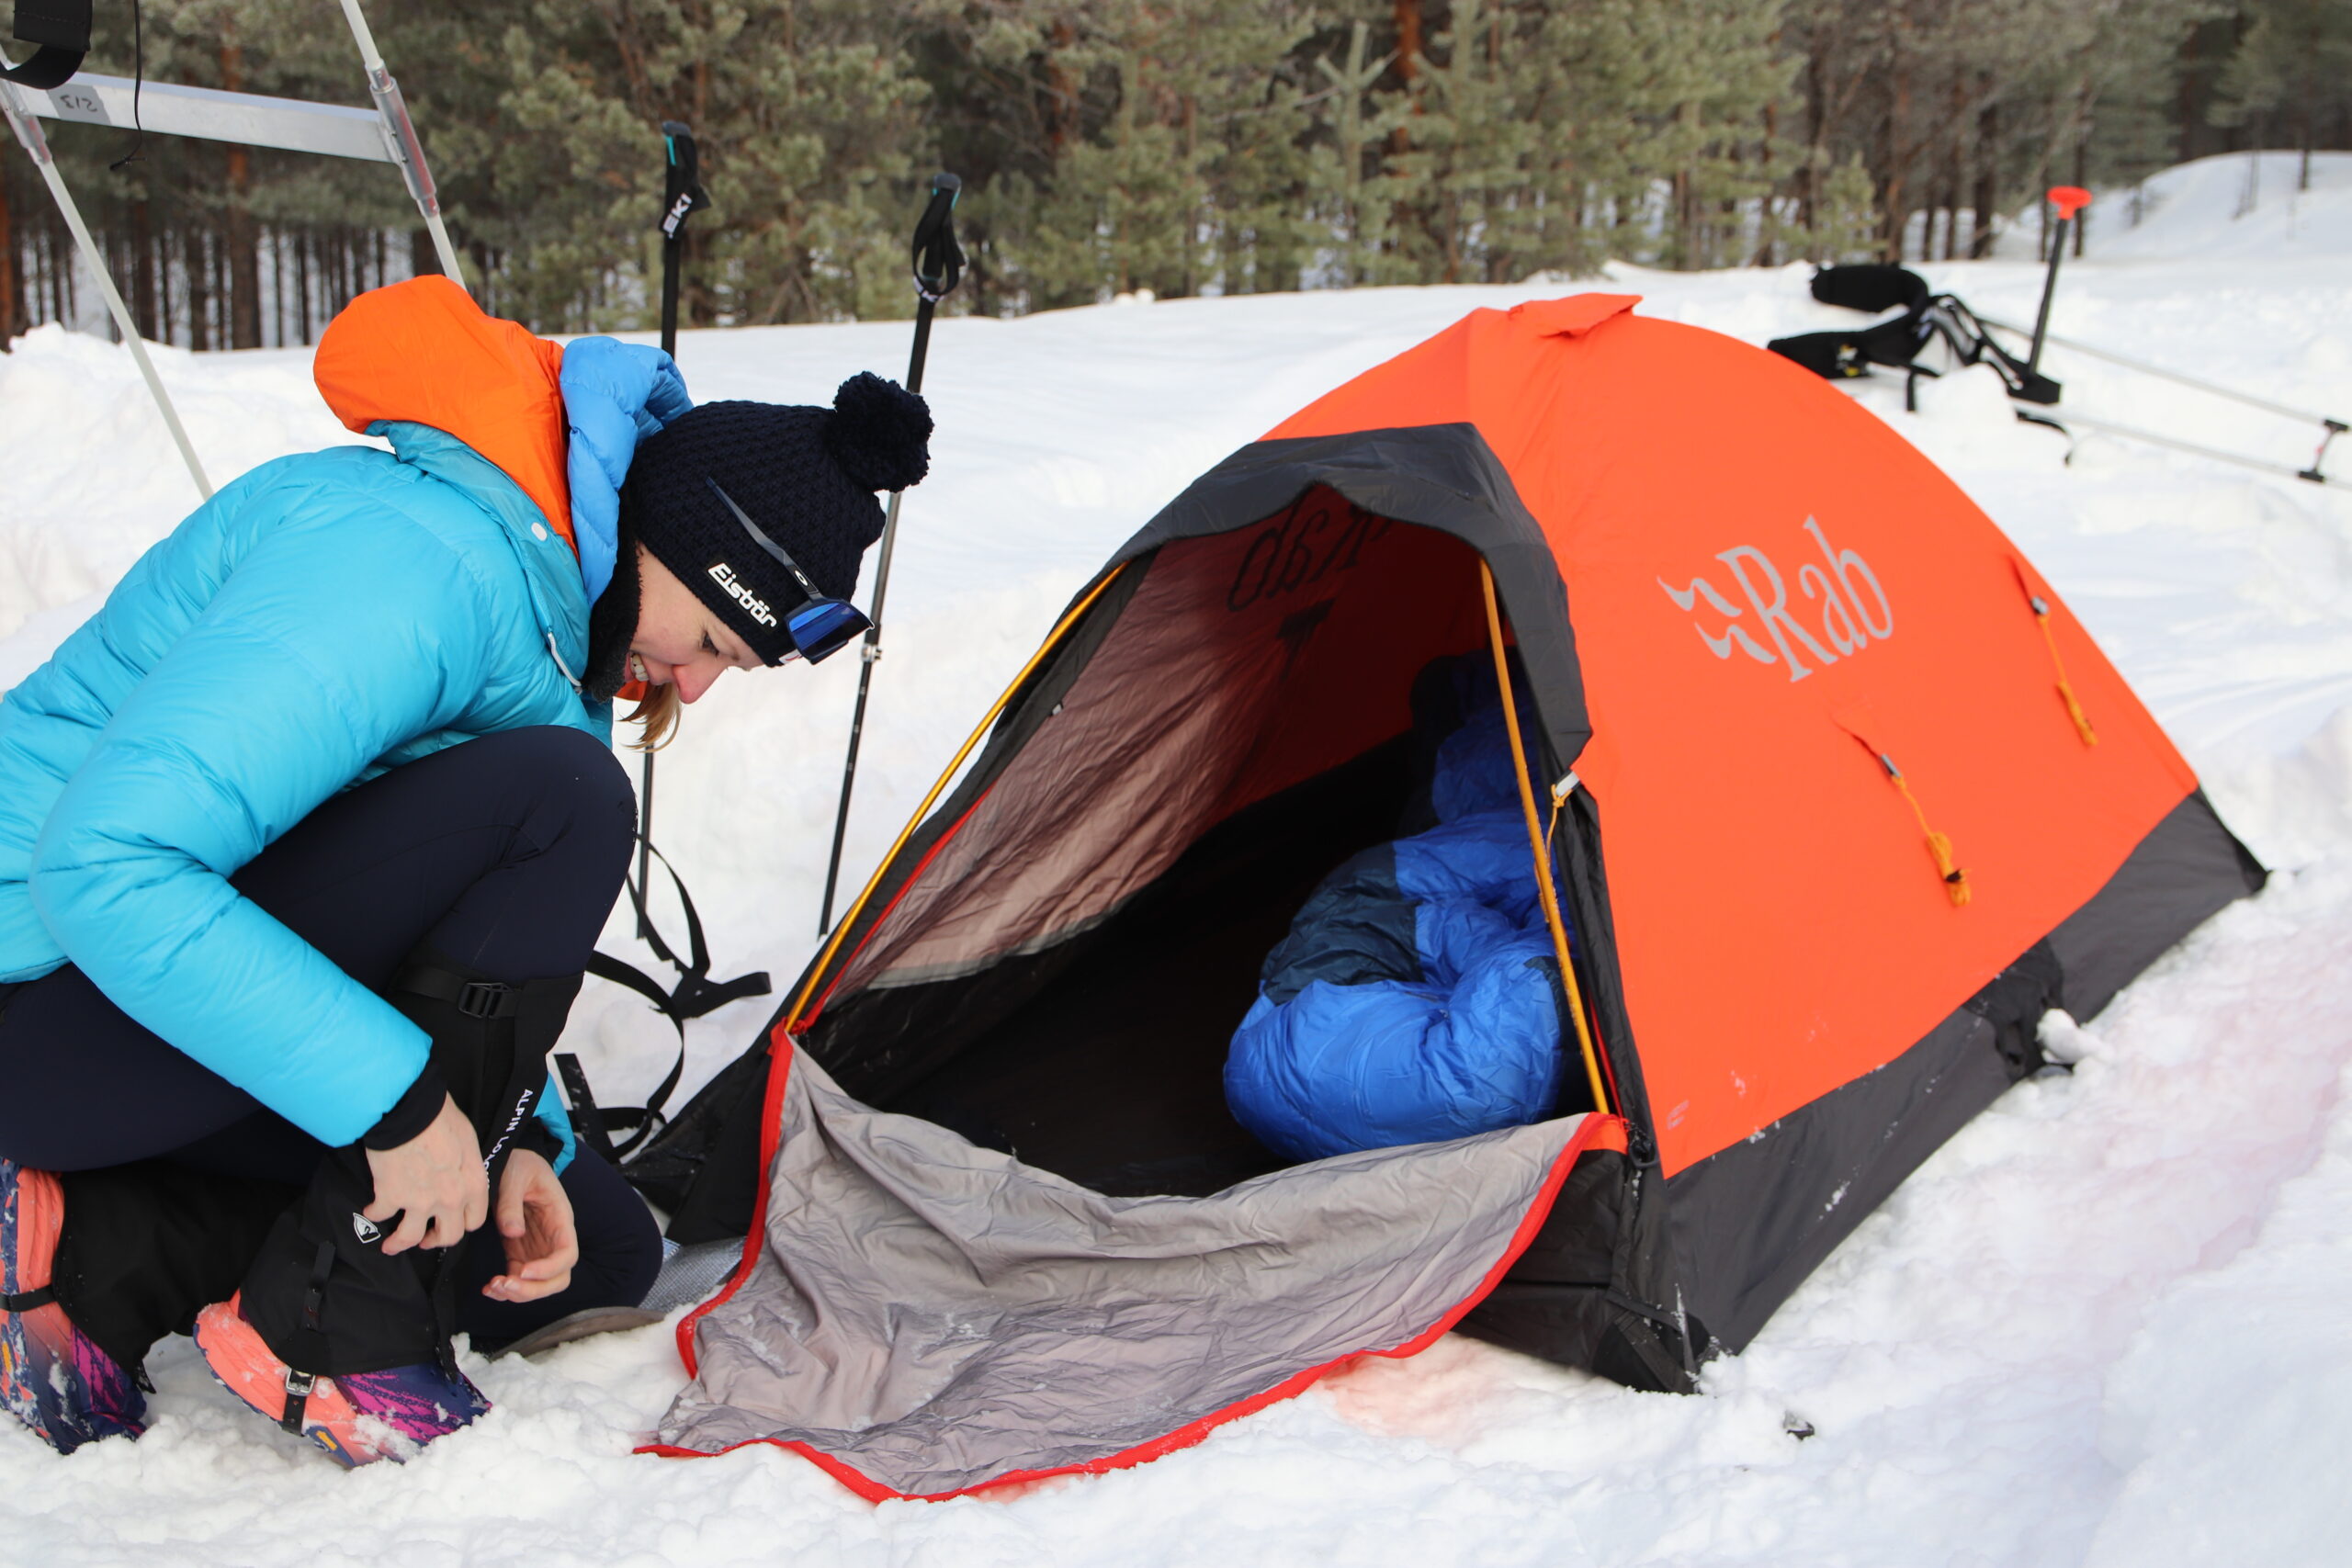
The Rab Latok Summit tent was originally designed with mountaineering in mind. However, if you would design a tent for winter ultras, it would not look much different. It has got pretty much everything you could want – a simple but functional design, light weight (1,590 g) and small pack size.

Of course, if you go on an expedition, you will need something more substantial – with more space, double-wall and absolutely stormproof. But for the YAU your priorities are different. Especially the self-standing design and the extremely quick set up and take down are really good. Which is probably why most athletes who look into the subject end up buying this tent. It works and has been tried and tested many times!

Also available for rent at EUR 199.

Shoes and snowshoes

Athletes have of course already used many different shoes for the YAU. I would say most shoes have been trail running shoes with a waterproof membrane. Choice of shoe is a very individual thing. If you easily get blisters you may want to try it without a Gore-Tex shoe but take waterproof socks. Also, there has been feedback that if temperature changes dramatically every day (so, e.g. from – 10 degrees C during the day to – 40 at night) membranes can break. Think about how you may repair your shoes. Possibly take a back-up pair into you first drop bag.

One thing is for sure, warm winter hiking boots, like some companies offer them, normally are not the best choice. When walking in them your feet will get so hot that within hours you will have the first blisters.

Whatever shoes you get, make sure you give yourself plenty of time to train in them.

When buying your shoes for the YAU keep in mind that you may have several layers of socks and/or very thick socks. And as in any ultra your feet will likely swell up.

Snow conditions can vary significantly at the YAU. Having a lightweight snowshoe that has a deep cleat will give you the best traction on windblown sections of trail with deeper snow when snowshoes are required. Dion Snowshoes offer great energy return properties and optimal traction to allow for an efficient stride while running or hiking.

Light hiking shoe
There is a category of trail shoes that crosses the bridge between trail running and hiking. And I specifically refer to the type that covers your ankles. An example is the Topo Athletic Trailventure WP. Like all Topos it is very comfortable and has a wide toe box. The latter being a really big plus for an ultra.

You may also know similar type shoes (just not with such a wide toe box) from brands like Salomon, La Sportiva and Merrell.

411 g
(size EU 42)

Trail Running shoe The choice is almost endless. All big brands make models with a GORE-TEX® membrane or similar. Obviously, if you prefer a shoe with no membrane, you have even more choice.

As an example, let’s take the La Sportiva Jackal II GTX with the innovative Infinitoo™ high energy return and invisible fit technologies.

305 g
(size UK 8)

Spikes The race rules state “Crampons or similar device” as mandatory. You could also refer to it as spikes. Kahtoola has created this product category more than 20 years ago with their legendary MICROspikes. They are easy to use and very reliable.

312 g
(size M)

Snowshoes Not surprisingly you can’t just take any snowshoe. As a matter of fact most snowshoes won’t do the trick. They will either be too heavy, not work with the kind of footwear you will be using – because they are made for mountaineering or snowshoeing crosscountry.

What you need is a very light snowshoe that works with light footwear and a fast pace. Dion Snowshoes are perfect. Their modular 121 frame with secure fit binding and deep cleat is light and made for trail running and light hiking shoes.

For Canadian and international orders please go to Spafford Health & Adventure. For USA orders please got to DionNevitrek.com.

1,012 g (per pair)

Other options / Things to consider:

A very useful product are the Neos Overshoes. You can wear these over your running shoes. They are wind- and waterproof and do not breath. So, they also act as a vapour barrier liner keeping back body heat when it gets really cold. And the waterproofness is great when you get to a place with overflow. These Overshoes are not easy to get in Europe. But you can order from North America or ask Coast Mountain Sports in Whitehorse to reserve a pair in your size.

Saving weight:

In 2025 Kahtoola have released their MICROspikes® Ghost. These only weight 192 g (size M) but provide the same quality traction. And what is even more interesting, they managed to further improve the fit – which can become very important when you wear them for hours on end; as even the really good regular MICROspikes® will push down on your toes and can cause you problems if you are not careful.

While there is not too much potential in saving weight regarding your shoes – unless you had originally planned on taking heavy boots. There is of course potential to go very light with snowshoes. And any snowshoes that is not made for running will likely be too heavy. Which is not only a disadvantage for overall weight but also for use.

Not taking overshoes saves weight but it’s one of those things where I would recommend not to compromise. Having Overshoes in a cold winter can make the difference between finish or DNF and healthy toes or frostbitten ones.

Headlamps

Under normal circumstance you will be spending a lot of time on the trail at night. So, you do not want to compromise on your headlamp(s).

Have a close look at the range of the light and the battery life. You do not need the most powerful headlamp on the market but a certain light range is good as it will help you pick up the reflective tape on the trail markers from further away.

A compact back-up headlamp is not mandatory. The emergency headlamp is. But it does make sense to have one in case your main headlamp breaks.

A separate battery pack definitely makes sense. You can have the batteries close to body heat. Which will give you a much longer battery life.

Main headlamp For your main headlamp you want a good light distance, light weight, a separate battery pack and both options – rechargeable battery and battery compartment that takes lithium batteries.  The Silva Trail Runner Free 2 Ultra is a perfect example. At 550 lumen and max. 80 m light distances it’s not the most powerful headlamp but you do not need more. More power means more weight and more battery management. 145 g (incl. battery pack)
Backup headlamp If your main headlamp breaks and can’t be fixed, you will want a backup headlamp. It can be more compact and lighter. If possible, it also should give you the option to run with lithium batteries. The Silva Discover is a good example It still has 500 lumen and it fullfills above criteria at a low price tag and with low weight.

68 g

Emergency headlamp Well, the name says it all. It’s for emergencies. So, you want super light and small. The light distance is not a focus here. It’s when your other headlamps don’t work or need to be charged. The Petzl e+LITE is as good as it gets. Of course there are other options that also do now weigh a lot more. 26 g

Other options / Things to consider:

Keep in mind that we want you to use your headlamp even if the moon would actually allow you to move without it. Dog teams, our guides and other people on snowmobile need to be able to see you. Otherwise there may be accidents.

Lithium batteries will last a lot longer and most headlamps are compatible with them. But do check compatibility.

Saving weight:

The longer the battery life, the less batteries you will have to take along. Thus saving weight. Also, it is tempting to get a very strong headlamp. Some lamps on the market really are amazingly strong. They turn the night into day. However, that usually does mean you need a lot of power, i.e. heavy battery pack. Of course, if you already own a lamp like that and you are happy with it, take it. But if you need 2,000 or more lumen for the YAU.

Putting your backup headlamp into the drop bag is only recommendable if it is a very robust headlamp or you can pack it in a way that it won’t break. Drop bags are piled up during transport and contents can break.

Trekking poles

Trekking poles for all those on foot are a great help. Especially up and downhill but also simply when you get very tired. They are also useful when signaling the snowmobile crew that you are bivvying next to the trail and when you want to check how deep an overflow is in front of you.

Regular trekking poles On the one trekking poles that can not be height adjusted are better. The mechanism that allows you to change the height on your poles may fail you repeatedly when it’s very cold. In general, it is something that can break. It usually also means the poles are heavier.

Black Diamond Distance Carbon Z Poles are an example for poles like that. Very light, foldable, one length. The carbon also does not conduct the cold like aluminum would. The disadvantage of carbon is of course that it does not bend. It breaks. If that happens you will likely not be able to fix your poles anymore.

An obvious disadvantage of fixed length poles is that you can’t fine tune the length – adjusting for long up- or downhills.

140 g/pole

(120 cm)

Nordic walking grip trekking poles Poles that feature nordic walking type grips have become very popular with trail runners. An example is the Leki Ultratrail FX.One. If used for long periods of time, this type of grip can be easier on your wrist. 167 g/pole

(120 cm)

Other options / Things to consider:

You will likely use your poles a lot. So, it does make sense to invest in a high quality product.

If your pole does not already come with winter plates, make sure that it is possible to buy winter plates and you can change these without any problems.

Saving weight:

Trekking poles are not mandatory. So, you could save weight by simply not taking any. However, that is only recommendable if you know for sure you don’t want or like poles when you hike and pull a pulk sled.

Another obvious way of saving weight is by taking carbon poles instead of aluminum ones.

Last but not least, there are some absolut ultralight poles on the market. Because of the terrain and the strain on the poles, I would not recommend to get these for the YAU. If you do use this type of pole, you have an increased risk of breaking them.

Hydration

If you carry a hydration bladder, have it as close to your body heat as possible, e.g. over your 1st layer but under your 2nd layer. Even if it is insulated.

Very often the mouthpiece or tube freeze. So, both should be insulated. Have the tube under your arm. Keep the mouthpiece inside if possible. Blowing the water out of the mouthpiece and tube can help keeping it from freezing.

Nothing beats a thermos when it comes to keeping your water hot/warm.

You can put chemical heatpads on to plastic bottles. Coke can stay liquid for quite a while that way. But it won’t last forever.

Vaccuum insulated stainless steel bottles I believe the Thermos Light & Compact series still is the best on the market when it comes to efficiency, i.e. it is very light and keeps the liquid hot/warm for very long.

510 g
(1 litre)

Bottle with insulation It depends on your overall strategy for the race if you need more volume than the mandatory 3 litres in thermos bottles. It does make sense as you need to drink a lot. As an addition you could go for a Nalgene Bottle with insulation. It’s very light. 183 g (bottle)

110 g (insulation)

Other options / Things to consider:

Having a water bladder as part of your hydration set-up comes with above mentioned challenges. In adddition, there is also the risk of leakage and you will sweat underneath the bladder. Switching it from the back to the front can help with that – if you carry it in something that allows you to do that.

Do not underestimate your need for hydration in the cold. If you do not drink enough the risk of frostbite and hypothermia increases a lot. Not to mention all other problems that go along with lack of hydration.

If it is part of your strategy to stop and melt snow, keep in mind that this can be pretty time consuming. Melting ice is more efficient but you may not always have ice near you …

It is very important that the lid on your Thermos is dry when you screw it onto the bottle again. If it’s we it may freeze to the bottle and be very difficult to open. Should that happen, deal with it. Warm up the bottle with body heat or with your stove. Remember, not drinking is not an alternative.

Saving weight:

There are quite a bit of differences in the weights of vaccuum insulated bottles. It’s worth comparing but also taking the efficiency into consideration, i.e. if the bottle is super light but bad at retaining heat, it’s not a good choice. It needs to combine both – hence, above recommendation of the Thermos Light & Compact series.

Food

Try your food at home / in training first. You may love the real food and be really disappointed from the expedition meal version.

If you know that you need plenty of food during a race, take enough extra food for between checkpoints. We do serve good size portions but these can’t replace the calories you will burn. And distances between checkpoints are loooong.

Food

Expedition meals Expedition meals in bags are usually the most efficient way to get warm meals with a good amount of calories. By now there are plenty of products on the market. One very good brand is the British Firepot. They use high quality ingredients and also have a great choice of vegan meals. approx. 100 g per package
Snacks The list of possible snacks is endless. From chocolate, nuts, dried fruits and sweets to energy bars dried meats and cheese. Anything that works for you is good. Keep in mind that there are restrictions on what you can bring into the country! n/a
Peronin Peronin is something very specific – originally develloped by Roberto Peroni for an Arctic expedition. It is interesting if you know that you are struggling to stomach solid food during an ultra – because you drink it. 100 g

Other options / Things to consider:

Some athletes make the mistake of eating too many energy bars and drinking too many gels. This may cause stomach issues. So plan for a good variation of snacks.

If your food has got a certain size, i.e. you need to take a bite, make sure you pre-cut it or have it close to body heat before you eat it. Otherwise it may be frozen rock solid and challenging to get it into you.

Don’t just take sweet stuff. Salty food can be a nice change every now and then.

Saving weight:

It’s not an easy subject. Scientific studies show have shown that you can’t possibly eat enough to make up for the calories you will burn during the YAU. So, there is a tendency to take A LOT of food. I am not a nutrition expert myself but often athletes do comment that they ended up taking too much food. Obviously, it’s better to have too much than not enough. But make good use of your drop bag! You don’t need to take all the food with you from the beginning. Also, adjust your food plan once you have a better idea about just how much you are eating every day.

Other

As you noticed the focus on the above list is on the athletes on foot. It does not contain info on bike or xc-ski specific gear like bike, bike accessories, xc-ski, etc. But hopefully also our bikers and xc-skiers will find some useful info.

Lithium-Batteries There probably are other brands but I think the most popular are the Energizer Lithium batteries.

Lithium batteries are very light and last a lot longer than regular alkaline batteries. But you shoud double check if the device are want to use these in is compatible.

depending
on size
Compass Because of its global needle, the Silva Expedition Global is a great compass for the YAU and any other adventure worldwide. tbc.
Multitool Things can break during the YAU. You may not always be able to fix every problem 100% but a Multitool can go along way helping you with improvised solutions until you get to a checkpoint. The Gerber MP 400 Compact Sport Multitool is big enough and still fairly light. 191 g
Saw The Fiskars Xtract saw is perfect for the YAU. The fully retractable blade is made of hardened steel. The handy and secure grip permits easy, fast and efficient cutting. Last but not least, it’s powerful enough but not too heavy. 127 g
Towel You obviously do not want a regular towel. Not even in your drop bag – it would weight too much and take up too much space. But to have something like the Sea to Summit Airlite Towel in your drop bag is great for Carmacks, the only checkpoint with a shower. 50 g (size M)
Dry Sacks Something like the Sea to Summit Ultra-Sil Dry Sacks can be very useful to organise kit that does need to stay dry (e.g. back-up clothing). It’s also good for overall organiation in your sled bag. from 20 g
(1 litre)
Stuff sacks If the contents do not need to be dry but you want to separate things for better sled organisation, Sea to Summit Ultra-Sil Stuff Sacks are very good. from 10 g

Other options / Things to consider:

Many athletes like listening to music while on the trail. Please keep in mind that you may not hear ski-doos or dog teams approaching. So, if the trail is very winding maybe rather not listen to music or at least keep your eyes open.

Don’t get your pack sacks too big. Otherwise, you will not improve your organisation. As always what you want will be at the bottom …

Lightweight Gear List

The focus of below gear list is lightweight but not the lightest weight possible! Going as light as possible means making compromises. If you do that, you are increasing your risk of (cold) injury. I only recommend going into that direction if you have years of experience.

Needless to say, your gear also depends on the distance you signed up for and the weather forecast. When it is obvious that the weather will go to extremes, lightweight can’t be your priority.

Let’s say the below gear list is for the 375 km race and you want to hit the sweet spot between a light sled and feeling confident about your safety. Because I am male myself and size L, I will take that as the basis. Apologies to all women but I hope the list helps you, too. Furthermore, the discipline is foot. A lot of kit is of course the same for fatbike and ski but there are some specifics for the latter two I won’t get into here. Anybody with questions specific to fatbiking and skiing, please use our public facebook group to ask questions or reach out to me via email or WhatsApp.

Disclaimer: Obviously, any gear list always is individual. Some people feel totally comfortable at – 30° C whilst others already need some fairly warm layers at – 10° C. Obviously, their gear lists will differ significantly. So, the below is just some inspiration but not the perfect list for all!

Remember, having the right gear is just step #1. You also need to know how to use it, think ahead, be alert, eat, drink and rest well. AND you need to use common sense.

Not all weights are exact, i.e. I have not had the product in front of me to put on a scale!

Clothing

I assume a temperature of about -20 degrees C as I am moving. I am wearing Running Briefs, one set of Woolpower 200 long underwear, a windproof touring pant with side vents and a Montane Extreme Smock for my upper body, Montane Windjammer Halo Beanie, Buff around my neck and Montane Supercell Waterproof Gloves.

2x Briefs runderwear Running Briefs

110 g

Thin longsleeve shirt with zip neck Montane Malli Long Sleeve Zip Merino T-Shirt

180 g

Thin Long Johns Montane Men’s Malli Merino Leggings

135 g

Thick longsleeve shirt with zip neck Warmpeace Fram Pullover

350 g

Thick long johns Warmpeace Fram Pants

290 g

Light fleece jacket with hood Montane Protium Lite Hooded Fleece Jacket

240 g

Thick long johns Warmpeace Fram Pants

290 g

Thin jacket with synthetic insulation Rab Xenair Alpine Flex Insulated Jacket

370 g

Thin down jacket Cumulus Inverse Jacket

250 g

Thick fleece jacket Montane Men’s Caldus XT Hooded Fleece Jacket

550 g

Insulated pants Cumulus Basic Down Pants

195 g

Insulated short Warmpeace Rond Short

190 g

Expedition down jacket Montane Apex 8000 Jacket

1,550 g

Lightweight liner gloves Extremities Thinny Gloves

50 g

Thin finger gloves Extremities Revert Gloves

108 g

Warm mitts Montane Extreme Mitts

145 g

Expedition down jacket Montane Apex 8000 Jacket

1,550 g

Back-up for my drop bag:

5x Briefs runderwear Running Briefs

ca. 275 g

Thick jacket with synthetic insulation Rab Cirrus Ultra Insulated Hooded Jacket

600 g

Light back-up gloves Montane Respond Insulated Gloves

65 g

Comments:

What I am not taking is a thick down jacket – remember on above made premises – is a thick down jacket for on the move. With all of the layers I have, I have to be able to stay warm when on the move. When I stop, I will put on my Expedition Down Jacket. I am also staying away from (very nice) but rather heavy merino wool layers.

For weight reasons I also decided for the down pants and against a pant with insulated fill. Furthermore, I won’t take a classic shell jacket. All the jackets I have feature a windproof outer. Should the weather forecast be for unseasonably warm weather with chances of wet snow or even rain, I will take a waterproof shell jacket with me.

If I am struggling a bit to stay warm during the coldest hours on the move, I will get the thick jacket with synthetic insulation out of my drop bag.

Should there be enough space in my drop bag, I will also add another medium weight fleece jacket into it – in case my other fleece jackets end up getting too smelly … and it will be nice to have at the finish.

Pulk sled

I have not done any scientific studies on how a light plastic pulk performs in different snow conditions and temperatures when compared to a heavier fiberglass pulk. There will be conditions when performance of a fiberglass pulk is better and the disadvantage of more weight becomes less relevant. However, because of the widespread use of plastic pulks in ultra races, the lower price and the lower weight, I will go with a classic plastic pulk as an example.

Sled Aiguille Trail Pulk Shell

2,300 g

Harness Aiguille Harness

470 g

Hauling shafts Aiguille Trail Pulk Hauling Shafts

1,800 g

Sled bag Aiguille Trail Pulk Bag

830 g

Straps Aiguille Trail Pulk Straps

290 g

Comments:

As already stated in the gear list above, you can shave of weight by going for ropes instead of rigid hauling shafts. Or you can build a hauling system with very light electrical piping and rope. You may also be able to find a bag or bag system that is less than 180 g. There probably is also a way to create a sled cover for a plastic pulk – but that would require quite some “craftsmanship”. Last but not least, instead of using Aiguilles four straps, you can probably come up with a lighter way to secure the load.

Sleeping

Sleeping bag Cumulus Excuistic 1500

2,270 g

Liner Sea to Summit Reactore Extreme

342 g

Sleeping mat Exped Ultra 8R

705 g

Closed-cell foam pad Therm-a-Rest Original Z Lite™ Sleeping Pad

410 g

Tent Rab Latok Summit

1,590 g

Back-up for my drop bag:

Vapor barrier liner Rab Hooded Vapour Barrier Sleeping Bag Liner

180 g

Comments:

The sleeping system is essential for survival in the worst conditions. And even if the conditions are not at there most extreme, it’s just nice and important for recovery to be able to sleep well. So, even tough I am aware of the added weight, here I am going 100% for safety and comfort.

I will leave the Vapor Barrier Liner in my drop bag and only get it out in case I notice that I am struggling too much to keep my sleeping bag dry.

Cooking, food and water

Expedition stove MSR XGK EX

380 g

Fuel bottle MSR 591 ml fuel bottle

167 g

Fuel Stove fuel handed out at Coast Mountain Sports

530 g

Pot Soto Titanium Pot 1100 ml

62 g

Bowl Sea to Summit Frontier Ultralight Collapsible Bowl Medium (680 ml)

62 g

Spoon Sea to Summit Frontier Ultralight Spoon – Long Handle

11.8 g

To be continued …